How I Painted ‘Golden Bamboo Forest’
Actual Painting Time: 3 hours
Paint Layers: 4 painted layers
How I achieved this look in my latest painting. I fell in love with the final product of this painting. I was tempted to do more layers, but I found myself enjoying it as it was. So I finished it with the final white later of white, signed it, and considered it done.
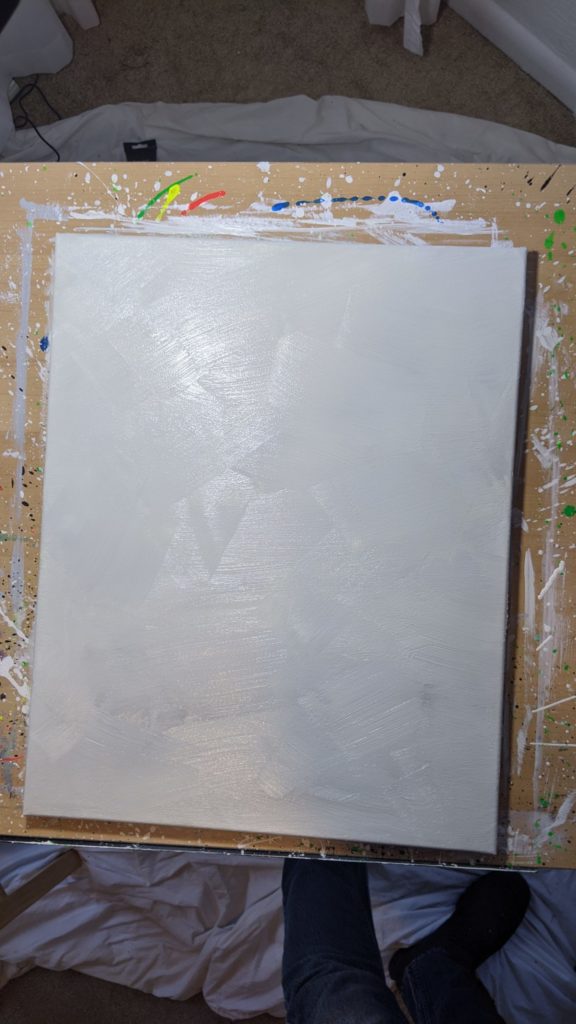
Layer 1: Off White Base Layer
I wanted to make the background an off white. I knew that I was going to put down a golden enso as a middle layer. I wanted that enso to stand out well, but I didn’t want it too busy. I knew that the second layer would create significant contrast. So I combined mostly white, along with yellow and just a dab of black.
In the end, the black was far too much; it created a grew background. But the overall direction was good and pleasant. I would like to make it more egg shell or off white (as opposed to grey) next time.
Before combining the paint:
After blending the paint:
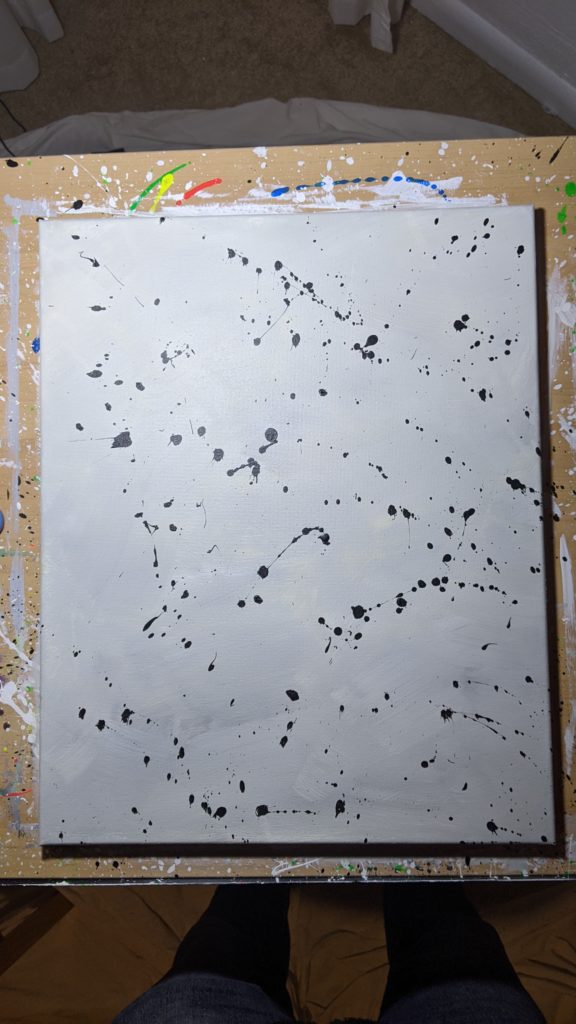
Layer 2: Black Splatter
This layer was a significance contrast layer. I knew that it would create the contrast necessary to bring out the gold. These particular splatters ended up well. I splatted the raw paint without thinning it with water at all. I have experimented with diluting it, but I like the thickness of the splatter with the undiluted pigment.
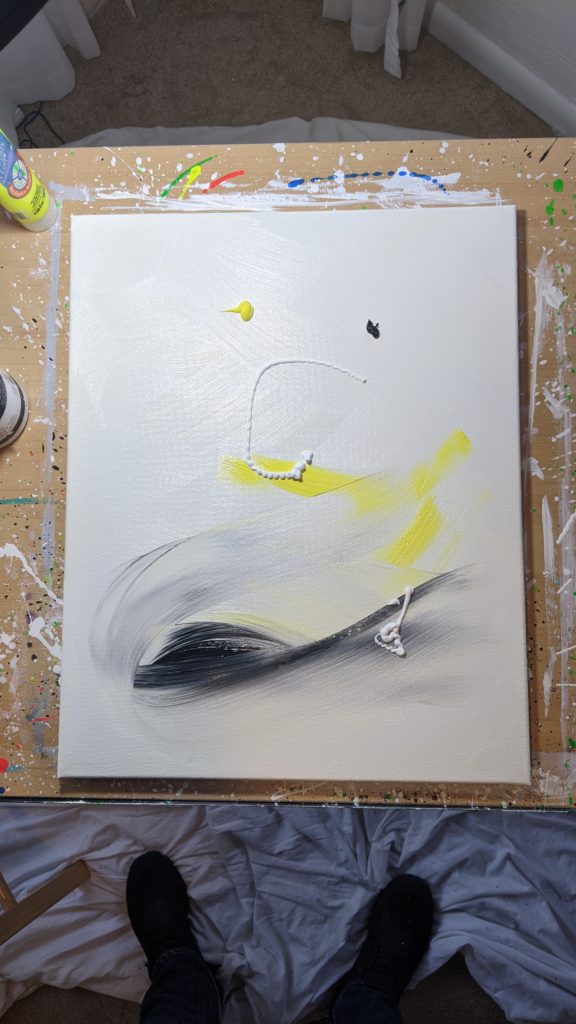
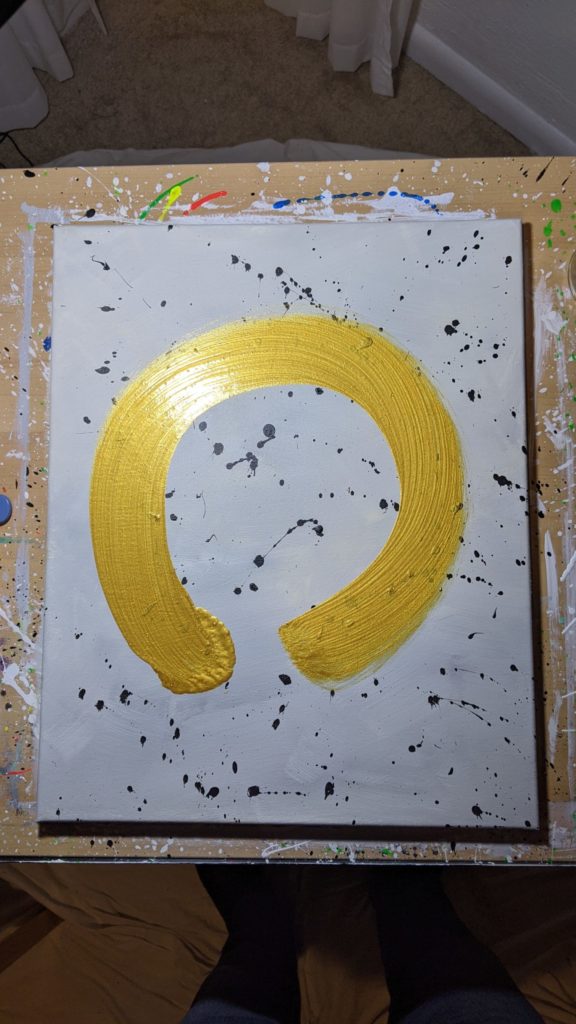
Layer 3: Golden Enso
This layer is always the most unnerving!
It takes courage to get it right. The way of the enso is: a single stroke, no modifying once it has been placed.
It takes focus, mindfulness of the moment, and familiarity with the tools.
For this particular enso, I had a large, round brush. I soaked it in water first, then shook out all the excess water so that just the bristles were wet. I then put metallic gold paint into a glass jar. I then soaked, swirled, and soaked the brush several times.
In the past, my ensos have come across somewhat dry. I wanted to prevent that and get a solid, golden enso. As it turns out, I over-saturated the brush so that it did not taper as much as I would have liked. However, once one has committed to the act of the stroke, an enso is cathartic and pleasing once complete.
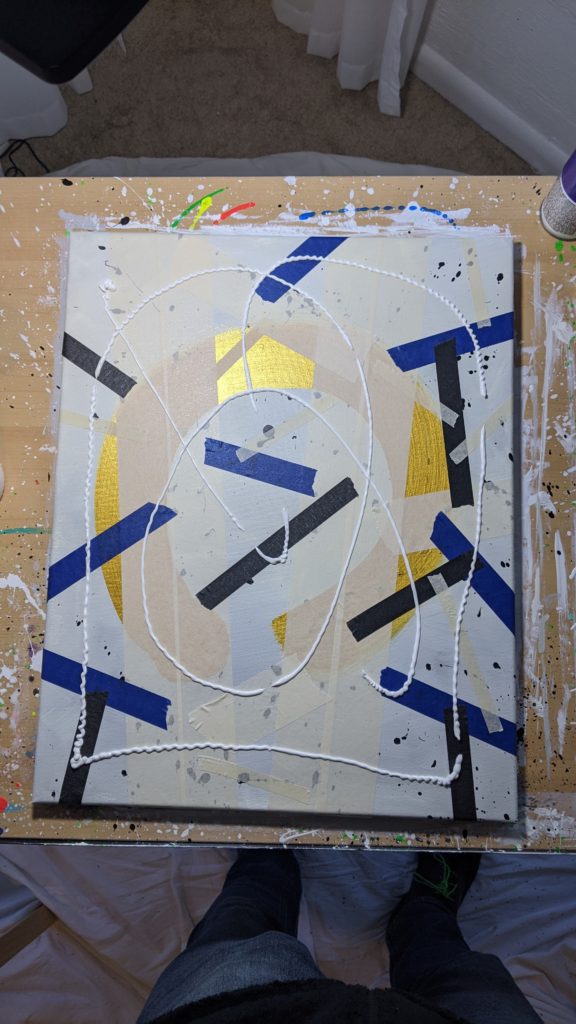
Layer 4: White Masked Overlay.
For this layer, I used 3 sizes of masking tape. I moved from the large, 3 inch masking tape, to the 1 inch, to the quarter inch.
The 3 inch masking tape was placed in such a way as to maximize the visibility of the golden enso once it was all complete. The 1 inch tape was then placed in such a way as to stem off of the 3 inch tape. Few, if any, stretches of the 1 inch tape originated on their own. I then applied the quarter inch tape to stem from the 1 inch tape.
The masking tape applied to the painting
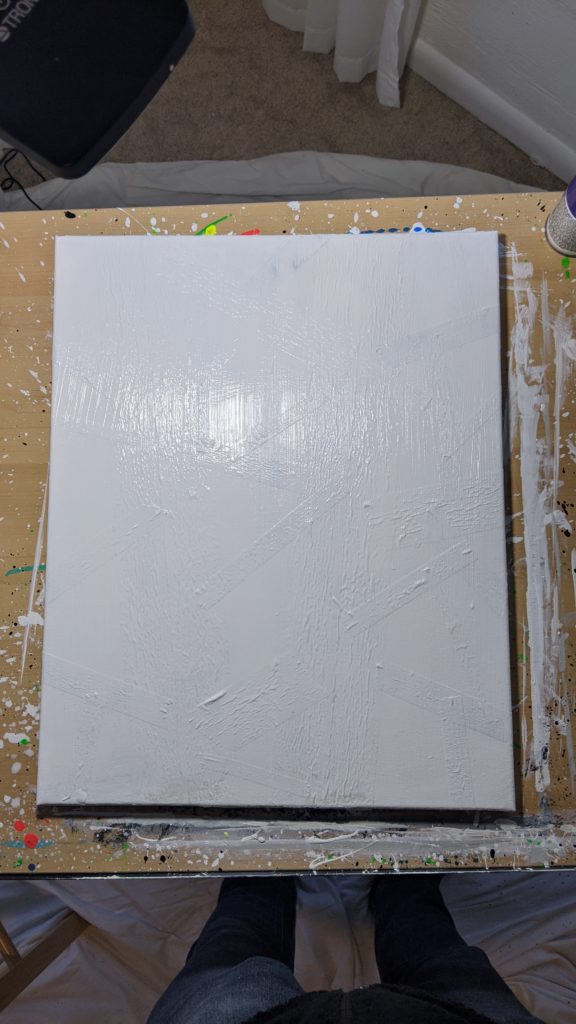
The White Paint Applied over the Mask
Then I applied 2 thick layers of white. I was interested in seeing how stark I could make the white appear (in contrast to the off white background and black splatter), while still allowing the golden enso to stand out. The trick with the mask and paint is to remove the paint before a.) it soaks through too much, and b.) it dries too much.
If the white paint soaks through too much, then it creeps in under the tape and the lines are not as clean. If it dries too much, when you peel it up the cover layer may pull up some of the color. Wait about 10 minutes and you should be fine.
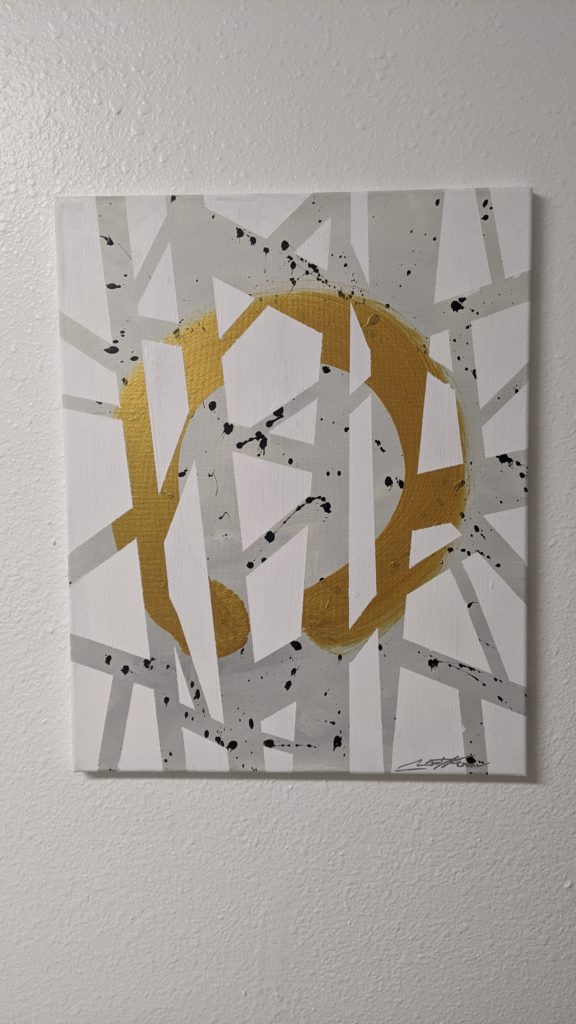
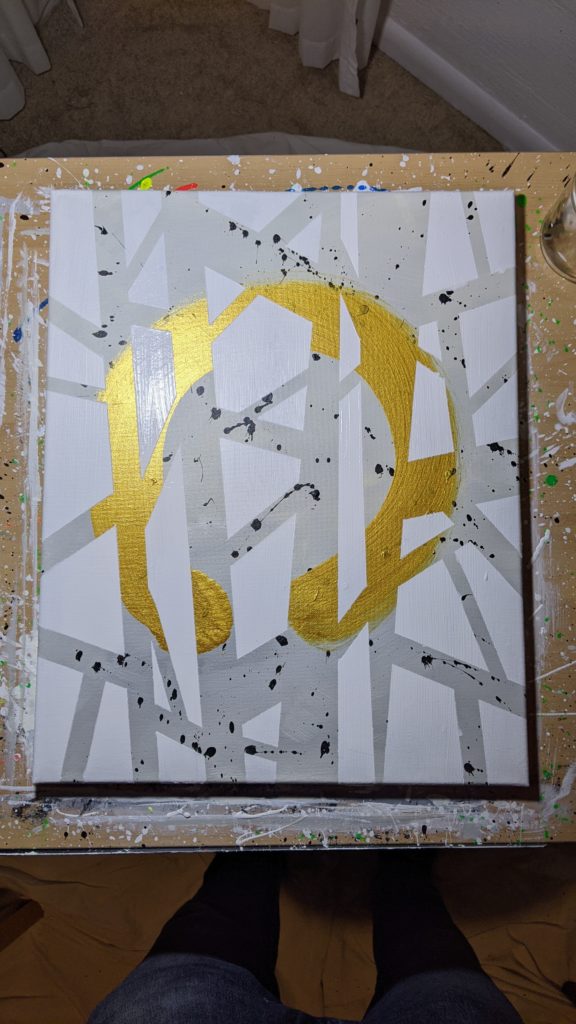
Finished Product
Once the paint has been drying over the mask for 10 – 15 minutes, peel up carefully. (If you drop a strip of masking tape with paint on it, it could definitely ruin the piece!) I actually enjoying peeling the masking tape off the painting. It is cathartic.
When the white masking tape pulled off of this painting, it was quite pleasant. As I said, the tail of the enso was fatter than I tried to make it, but, I enjoyed the final product just the same.


0 Comments